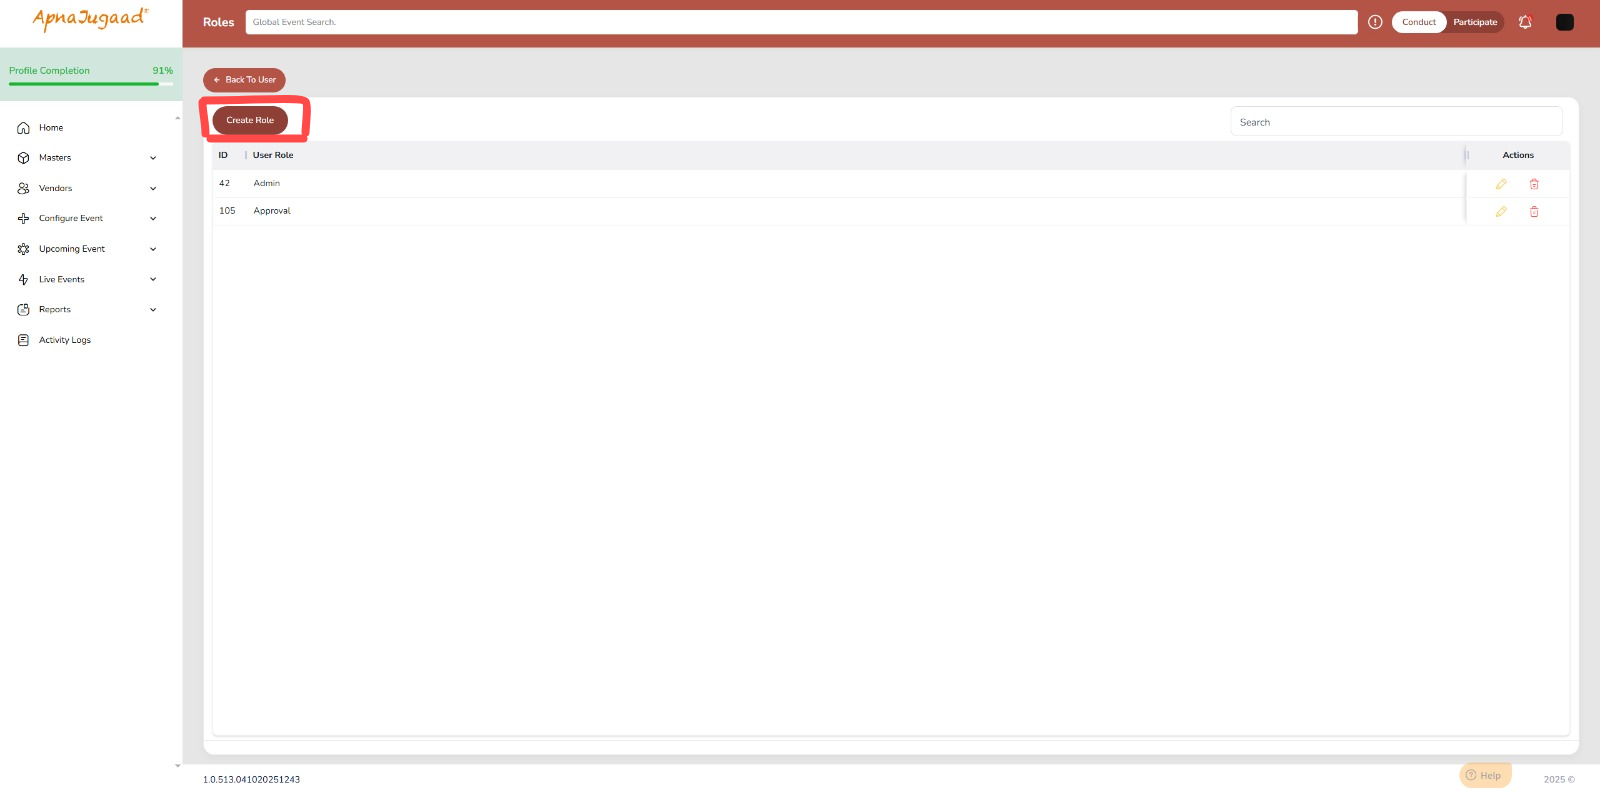
Step 1: Access the "Create Role" Screen
Navigate to the administrative section of the ApnaJugaad Portal where user roles are managed.
Click on the Admin > Manage User & Role > Manage Roles > Create New Role.
Step 2: Define the Role Name
In the "Role name" field, enter a clear and descriptive name for the new role.
Example: "Procurement Manager," "Supplier Admin," "Event Coordinator."
This name should clearly indicate the primary function of users assigned to this role.
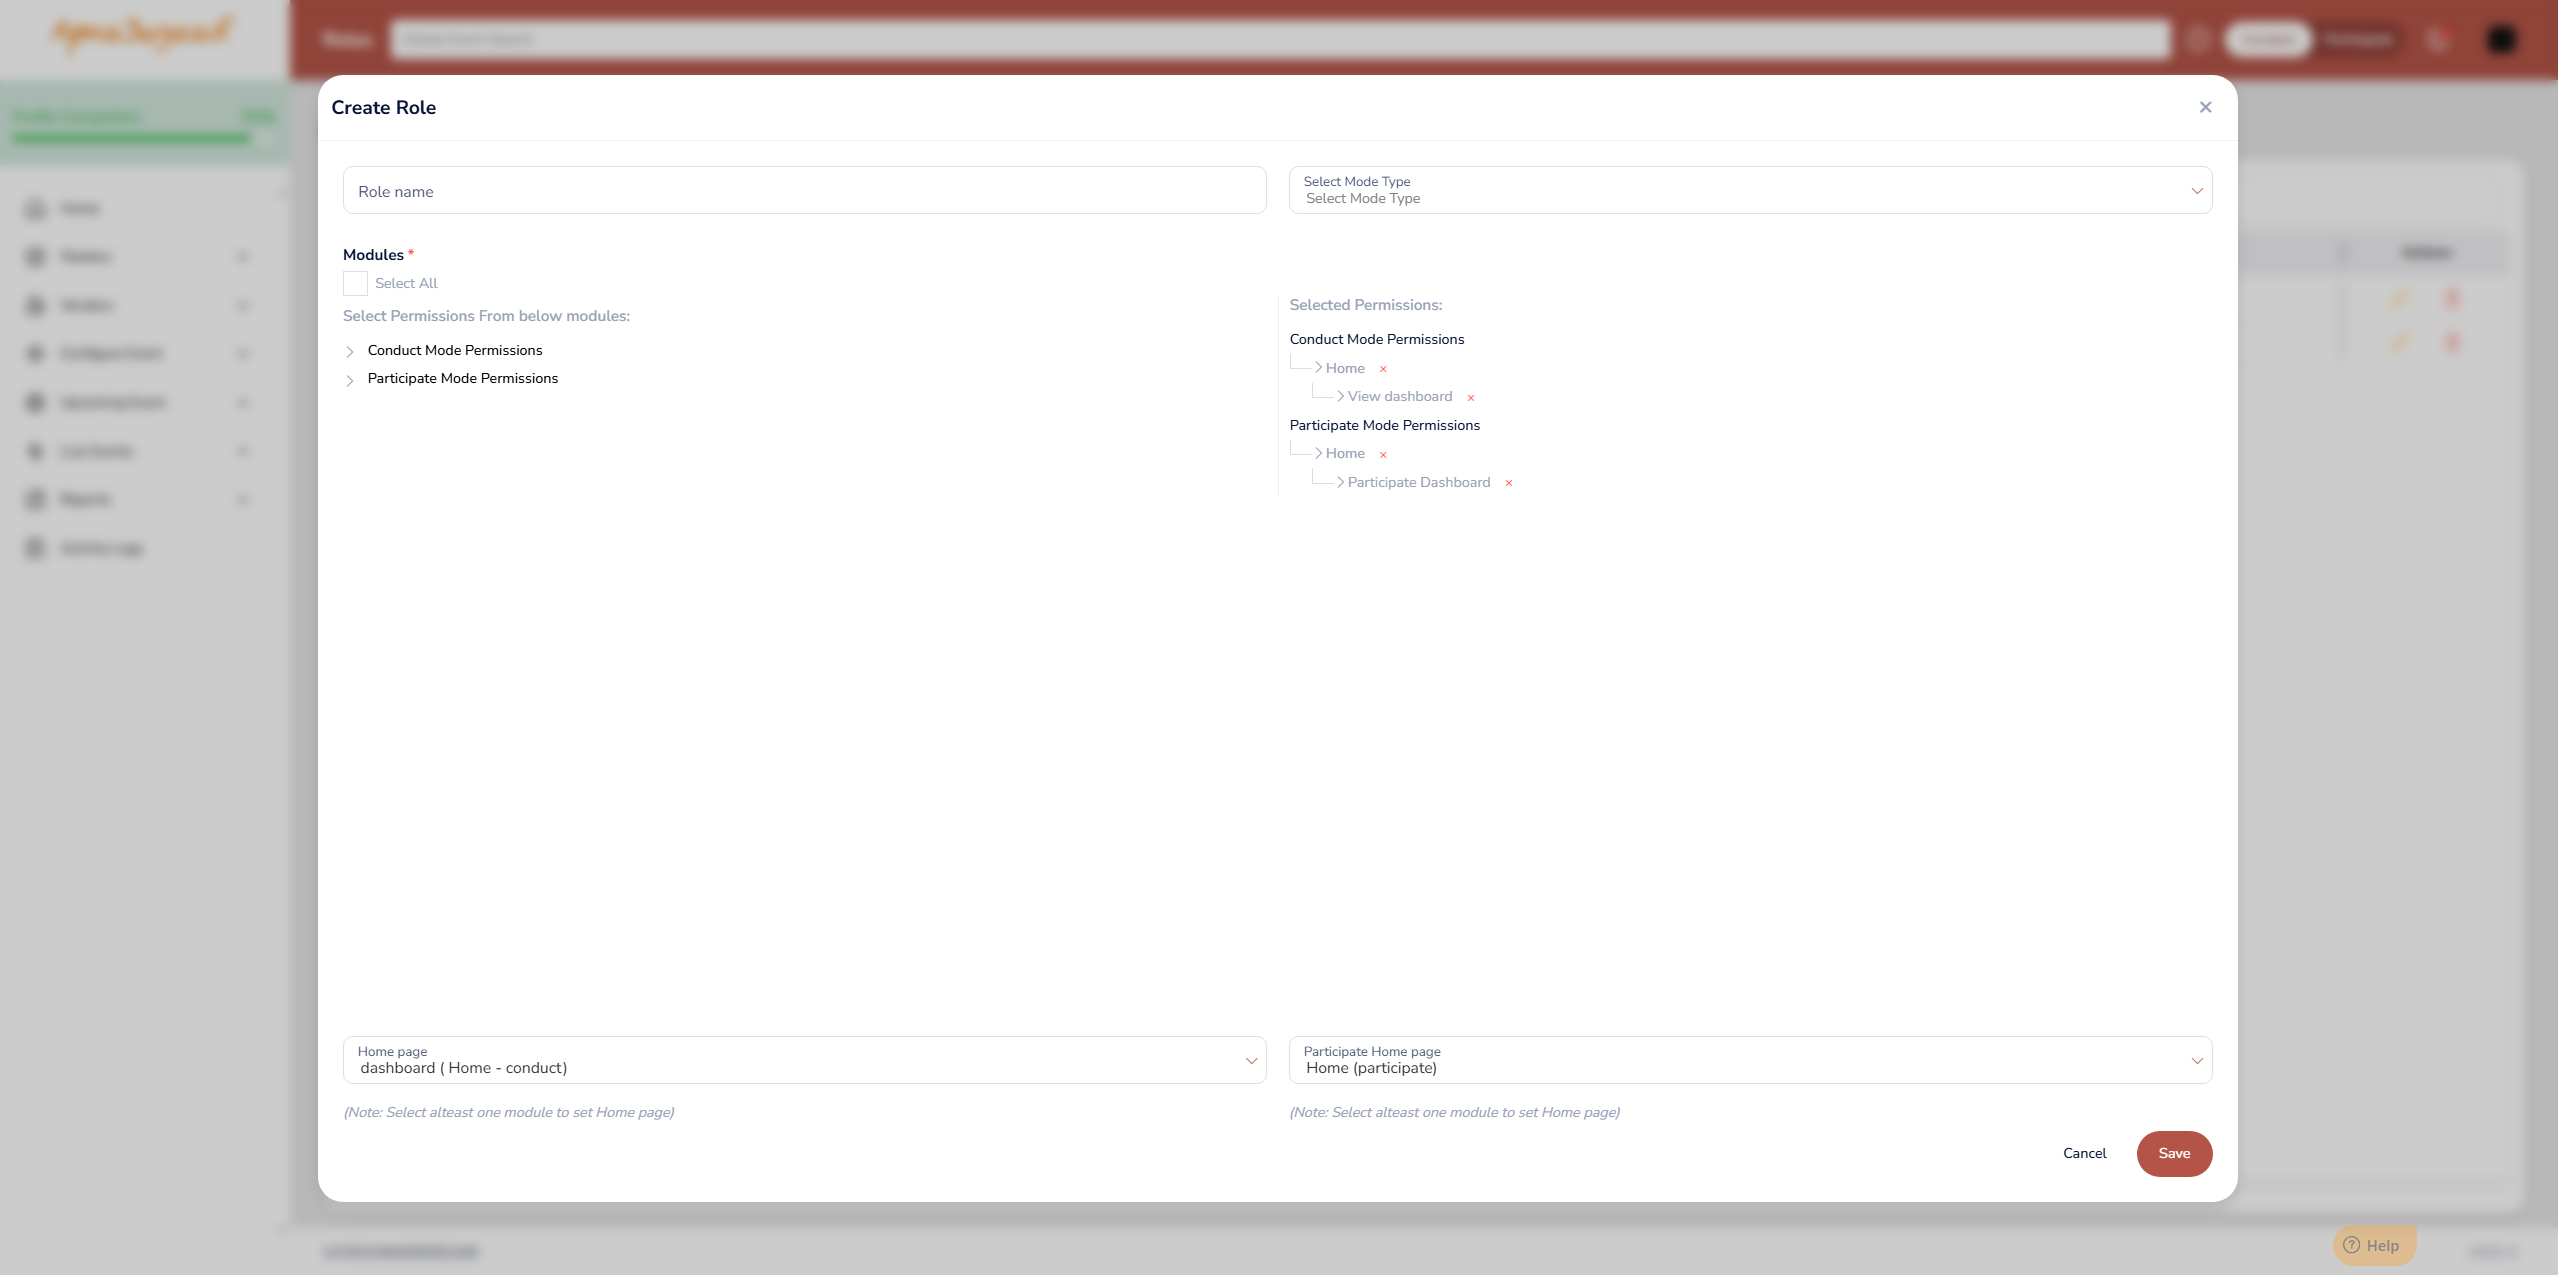
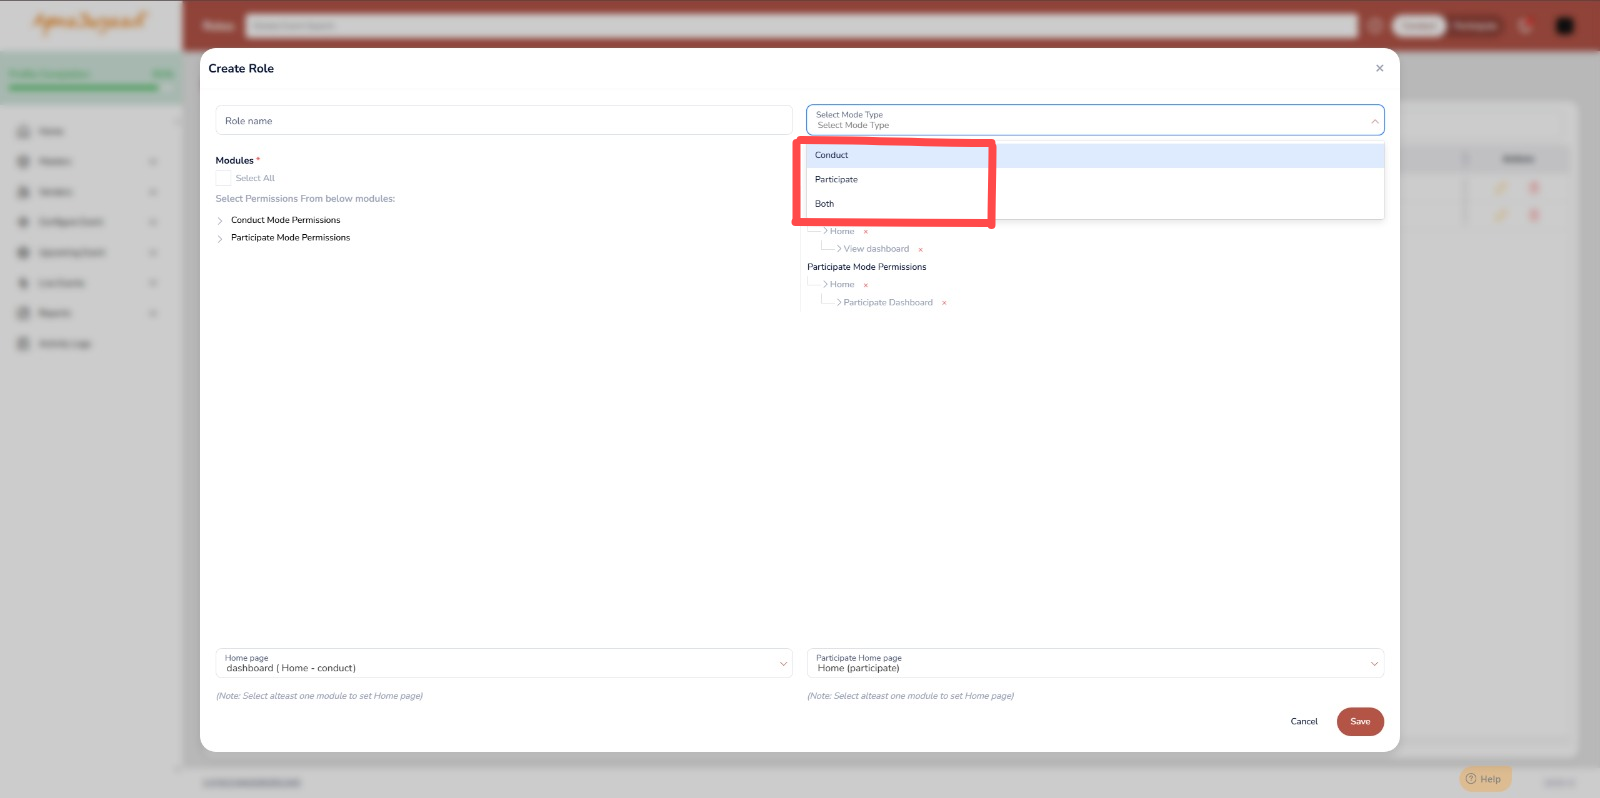
Step 3: Select the Mode Type
From the "Select Mode Type" dropdown, choose the operational focus for this role:
Conduct: For users who will primarily create and manage events (like RFQs, auctions).
Participate: For users who will primarily respond to and participate in events created by others.
Both: For users who need permissions for both creating/managing and participating in events.
Your selection here will determine which permission sections (Conduct Mode Permissions, Participate Mode Permissions) are relevant.
Step 4: Configure Module Permissions
This is the core step for defining what the role can do. Permissions are organized under "Modules," which are different sections or functionalities of the portal.
To assign specific permissions:
Expand Permission Sections: Click on the arrow next to "Conduct Mode Permissions" and/or "Participate Mode Permissions" (depending on your "Mode Type").
Select Modules/Functions: Browse the detailed list of modules (e.g., dashboard, user-management, masters/products, Live Enquiry).
Check the Boxes: For each module or specific function you want to grant access to, check the corresponding box
(Optional: Use "Select All" if you intend to give all permissions, typically for highly administrative roles. Use with caution.)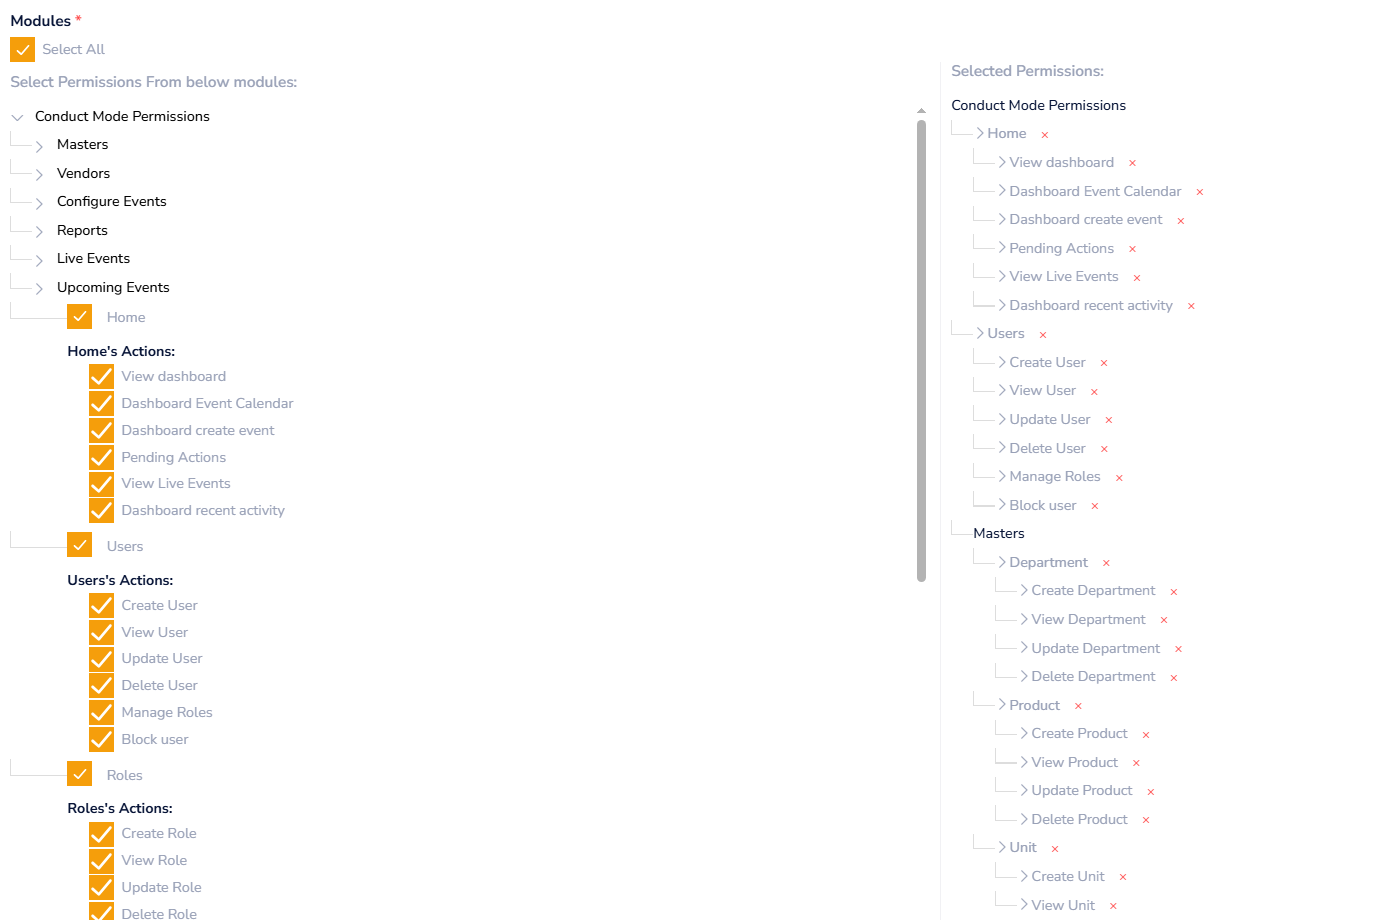
Link of the List of Roles and Permission:
https://apnajugaadco.freshdesk.com/a/solutions/articles/1130000038069
Remember: Selecting at least one module permission is mandatory.
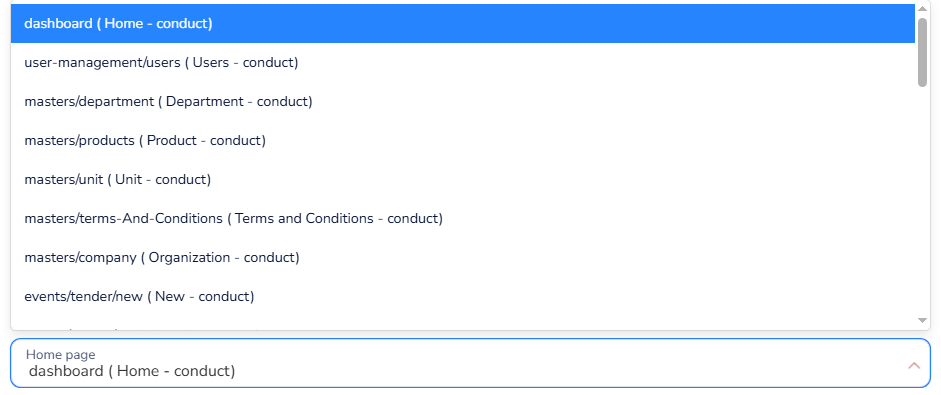
Step 5: Set Default Home Pages (Optional but Recommended)
After assigning permissions, you can specify the default landing page for users assigned to this role.
For "Home page (Home - conduct)": If you selected "Conduct" or "Both" as the Mode Type and granted "Conduct Mode Permissions," use this dropdown to choose the main page users will see upon logging in (e.g., dashboard (Home - conduct)).
For "Participate Home page (Home - participate)": If you selected "Participate" or "Both" as the Mode Type and granted "Participate Mode Permissions," use this dropdown to choose the main page users will see upon logging in (e.g., Home (participate) or Live Enquiry (participate)).
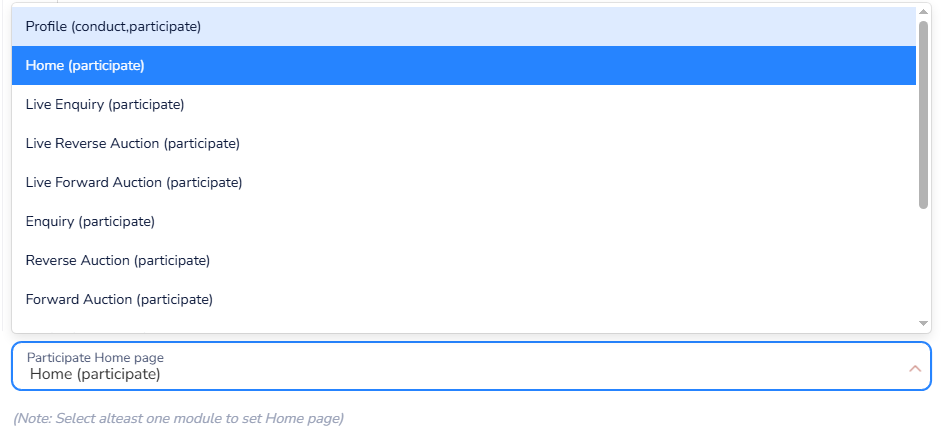
Note: You must have enabled at least one module's permission for a given mode to be able to set its home page.
Step 6: Save the New Role
Once you have thoroughly reviewed all the settings (Role name, Mode Type, specific permissions, and home pages), click the "Save" button located at the bottom-right of the screen.
Step 7: Verify (Post-Creation)
Though not on this screen, a best practice is to assign this new role to a test user and log in as that user to verify that the permissions and home pages function exactly as intended.
Was this article helpful?
That’s Great!
Thank you for your feedback
Sorry! We couldn't be helpful
Thank you for your feedback
Feedback sent
We appreciate your effort and will try to fix the article